| View previous topic :: View next topic |
| Author |
Message |
Deuche Fester
Dropped

Joined: 17 Apr 2008
Posts: 102
Location: Hilversum, The Netherlands
|
 Posted: Mon Jan 26, 2009 4:23 pm Post subject: Engine rebuild and tuning Posted: Mon Jan 26, 2009 4:23 pm Post subject: Engine rebuild and tuning |
 |
|
Hi all,
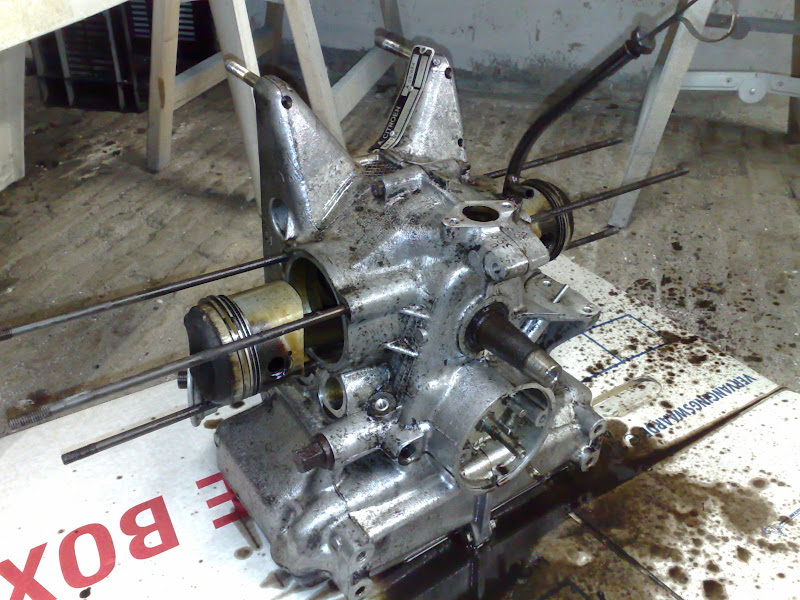
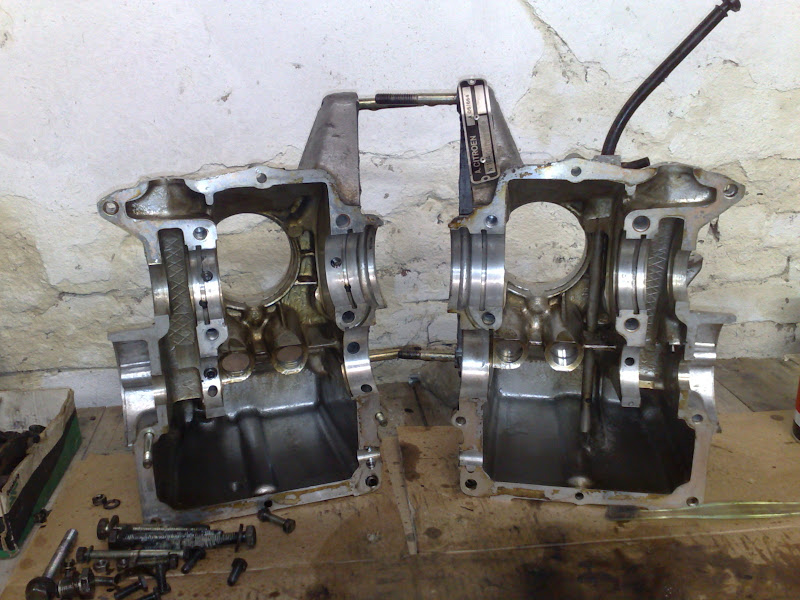
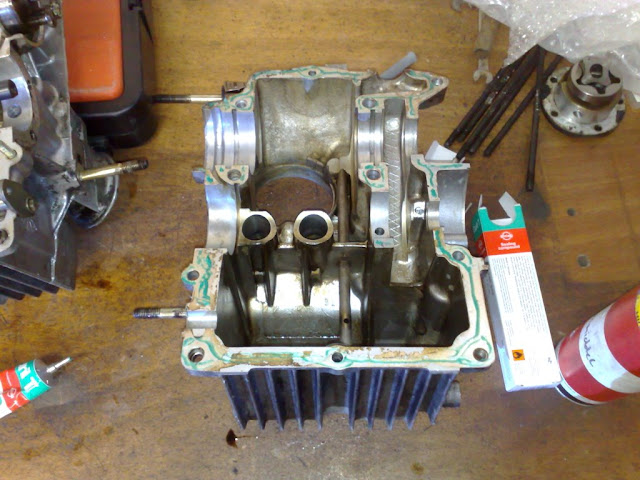
For the last couple of months, sadly, my deuche had to stay indoors. It all started with a simple job of fitting new intake/exhaust seals but as i took apart the necessary parts i realized there was more work to be done.
The cilinder head pushrod pipes were damaged on the side of the block. The previous owner seems to have been a little impatient.. Also, there was only 1 S6 head on there. I took apart the entire engine, and started to clean it thoroughly. So far the engine block is pretty clean, the cilinders and barrels i will replace.
I'm waiting for Kent Cams to deliver my freshly ground racing camshaft tomorrow. Also i will order a set of barrels and pistons (9:0:1 compression rate) at ECAS this week.
A new clutch will be installed, and everywhere brand new seals.
I will check to see if i can re-use the current valves, otherwise i can try the modified racing valves as well.
I expect to have a replacement oil cooler and new oil filter tomorrow. I hope the cam shaft will arrive on time, then i can FINALLY put the engine back together!
Some pics:

 |
|
| Back to top |
|
 |
Deuche Fester
Dropped
Joined: 17 Apr 2008
Posts: 102
Location: Hilversum, The Netherlands
|
| Posted: Tue Jan 27, 2009 6:42 pm Post subject: |
|
|
Today i received the modified cam shaft, the oil cooler, oil filter and spark plugs i ordered. Also i went and got some liquid sealant (is that what the stuff is called, used to bond the two halves of the engine together?).
More pics tonight after i assembled the engine base! |
|
| Back to top |
|
|
Deuche Fester
Dropped
Joined: 17 Apr 2008
Posts: 102
Location: Hilversum, The Netherlands
|
| Posted: Wed Jan 28, 2009 9:40 am Post subject: |
|
|
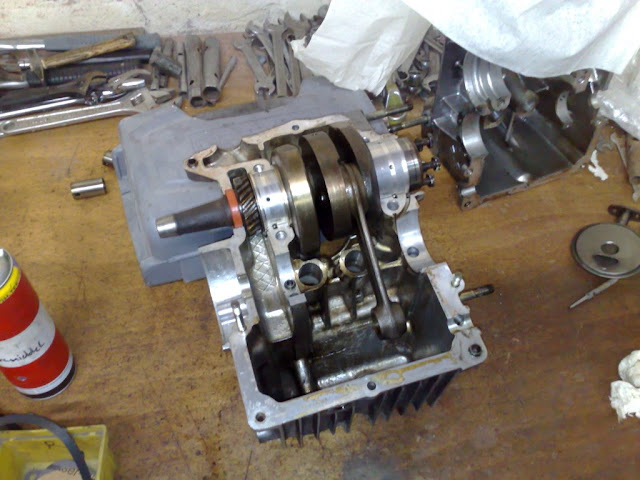
Crankshaft is placed first. have to align the holes in the bearings with the pins.
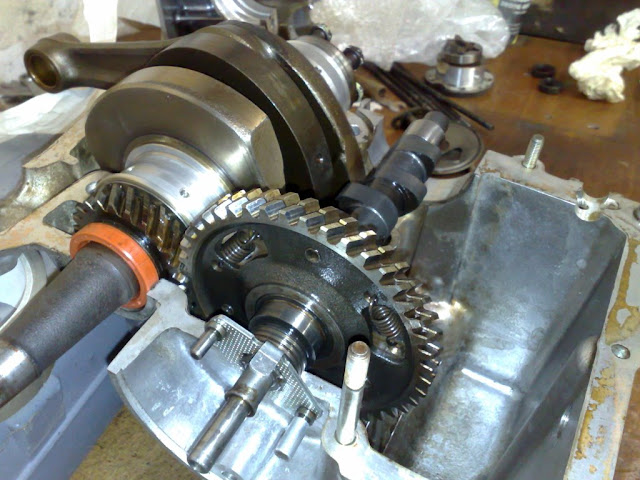
Then, the cam shaft is installed. Very important to align the lines on the gears. there is one line on the gear of the crankshaft and that has to be between the two lines on the gear of the cam shaft. Otherwise the timing will be way off and the engine will not run.
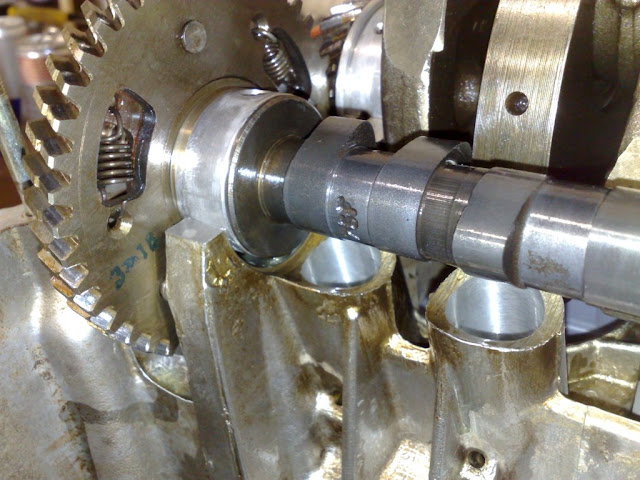
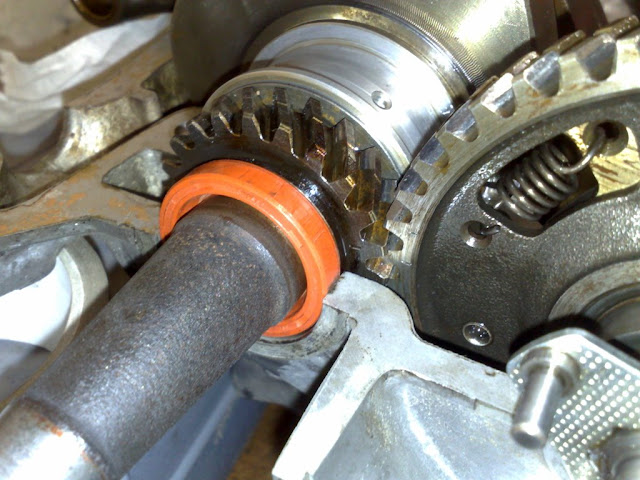
Here is the bearing on the cam shaft. there is a small pipe that needs to fit exactly in the hole in the bearing.
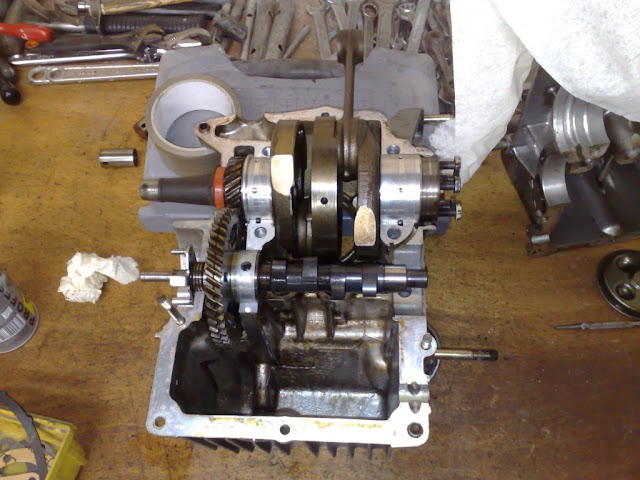
Presto!
Not in the picture: New rubber ring on the oil siff. And liquid sealant where it meets the carter half.
Liquid sealant all round.

There! All together again! Feels good doesn't it!
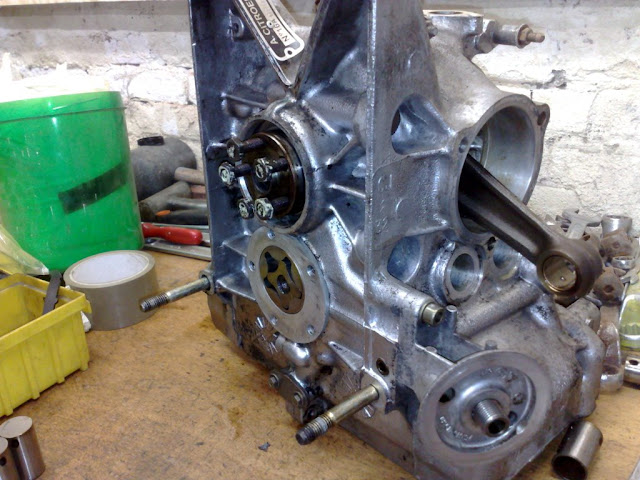
Oil pump installed.
_________________
 |
|
| Back to top |
|
|
JuanNavarro
Dropped

Joined: 16 Feb 2008
Posts: 171
Location: Madrid (Spain)
|
| Posted: Wed Jan 28, 2009 11:29 am Post subject: |
|
|
Front and rear crankshaft oil seals must be installed after join the two crankcases toghether, please take this into account  looking at the pics it seems that you put the front seal before closing the engine. looking at the pics it seems that you put the front seal before closing the engine. |
|
| Back to top |
|
|
björn
Lowered
Joined: 19 Jun 2007
Posts: 1695
Location: hillywood(hilversum)/holland
|
| Posted: Wed Jan 28, 2009 1:35 pm Post subject: |
|
|
treu whe did
is this a problem?
_________________
 |
|
| Back to top |
|
|
backfire
Dropped
Joined: 14 Nov 2007
Posts: 346
Location: NL, 's-Hertogenbosch
|
| Posted: Wed Jan 28, 2009 2:22 pm Post subject: |
|
|
It can become a problem, because the seal is pressed a little oval. So if you want you could open the engine up and close it again, or wait, test it. If the seal starts to leak, take it out en put in a new one.
_________________
2CV, with Visa turbo charged |
|
| Back to top |
|
|
Deuche Fester
Dropped
Joined: 17 Apr 2008
Posts: 102
Location: Hilversum, The Netherlands
|
| Posted: Thu Jan 29, 2009 1:05 am Post subject: |
|
|
I did just seal the whole block with liquid sealant, but perhaps it's better not to run the risk of having a leak.
Thanks for the info!
_________________
|
|
| Back to top |
|
|
JuanNavarro
Dropped
Joined: 16 Feb 2008
Posts: 171
Location: Madrid (Spain)
|
| Posted: Thu Jan 29, 2009 10:31 am Post subject: |
|
|
true 
Usually the seals have a tiny lips on the outer surface, that achieve the sealant effect by pressing it linearly, but if you mount the seal before, the forces are somehow radial, and the lips doesnt make the effect they are designed for. It also can occur that you squeeze a little part of the seal rubber between the crancase halves, causing leakage, in this case is better mount a new seal, not the damaged one (inspect for it if you pretend to remount again this seal)
A slight sealant liquid coat when mounting the seal is not bad, it lubricates while mounting it, adheres it after, and ensures no leakage in the contour, but if the bore is in perfect condition it isn't necessary at all. |
|
| Back to top |
|
|
Deuche Fester
Dropped
Joined: 17 Apr 2008
Posts: 102
Location: Hilversum, The Netherlands
|
| Posted: Thu Jan 29, 2009 11:40 am Post subject: |
|
|
Thanks again Juan, I gave it some more thought and since i only have to unscrew a few bolts, i will definately do that. I will take out the seal, close the block again and afterwards fit the seal.
Thanks again, i appreciate your keen eye :)
_________________
|
|
| Back to top |
|
|
Bart
Lowered

Joined: 17 Jun 2007
Posts: 783
Location: Södertälje
|
| Posted: Thu Jan 29, 2009 12:27 pm Post subject: |
|
|
If you split the block again, may I than advice you to remove the old liquid sealing/gasket traces on the contact faces as well.
_________________
I like to play  |
|
| Back to top |
|
|
Deuche Fester
Dropped
Joined: 17 Apr 2008
Posts: 102
Location: Hilversum, The Netherlands
|
| Posted: Thu Jan 29, 2009 12:29 pm Post subject: |
|
|
| Bartje wrote: | | If you split the block again, may I than advice you to remove the old liquid sealing/gasket traces on the contact faces as well. |
Yes i will definately clean up the surfaces again of course :)
Good news: i can pick up the new cilinders and pistons this saturday! I hope i will be able to complete the engine rebuild on sunday! Woohoo! good times!
_________________
|
|
| Back to top |
|
|
björn
Lowered
Joined: 19 Jun 2007
Posts: 1695
Location: hillywood(hilversum)/holland
|
| Posted: Thu Jan 29, 2009 1:38 pm Post subject: |
|
|
downt forget your cilinder heads!
_________________
|
|
| Back to top |
|
|
Bart
Lowered
Joined: 17 Jun 2007
Posts: 783
Location: Södertälje
|
| Posted: Thu Jan 29, 2009 1:47 pm Post subject: |
|
|
I don't mean the new green stuf you use, I thought that was obvious, but the old brown/yellowish traces... I am afraid they could cause oil leaks as well.
Sorry for being picky
_________________
I like to play |
|
| Back to top |
|
|
Deuche Fester
Dropped
Joined: 17 Apr 2008
Posts: 102
Location: Hilversum, The Netherlands
|
| Posted: Thu Jan 29, 2009 2:09 pm Post subject: |
|
|
| björn wrote: | | downt forget your cilinder heads! |
Indeed, finish cleaning the cilinder heads and valves too :)
| Bartje wrote: | I don't mean the new green stuf you use, I thought that was obvious, but the old brown/yellowish traces... I am afraid they could cause oil leaks as well.
Sorry for being picky |
Ah, well i admit i can run a sharp knife along and scrape that stuff off too. But it was really not that thick.
_________________
|
|
| Back to top |
|
|
JuanNavarro
Dropped
Joined: 16 Feb 2008
Posts: 171
Location: Madrid (Spain)
|
| Posted: Thu Jan 29, 2009 3:32 pm Post subject: |
|
|
| If you still doesnt have dismanteled again your crankcase i dont think its necessary just to remove the seal, just extract the one you have and inspect and clean the bore and put a new one. |
|
| Back to top |
|
|
|


