| View previous topic :: View next topic |
| Author |
Message |
JoZeF
Grave Digger
Joined: 25 May 2007
Posts: 1734
|
 Posted: Thu May 22, 2008 2:01 pm Post subject: Modifying the front arms Posted: Thu May 22, 2008 2:01 pm Post subject: Modifying the front arms |
 |
|
Hey
Right, it's an easy job to achieve a cooler looking ride by lowering the 2cv.
But, it comes with a problem, that can be easily solved.
Here's the whys and how to cure the "hard steering syndrome" of a stock lowered 2cv.
Tools needed :
- A Grinder with a thin cutting disc
- A Rule and Scriber
- A good MIG welder
- The usual spanners for bolting unbolting.
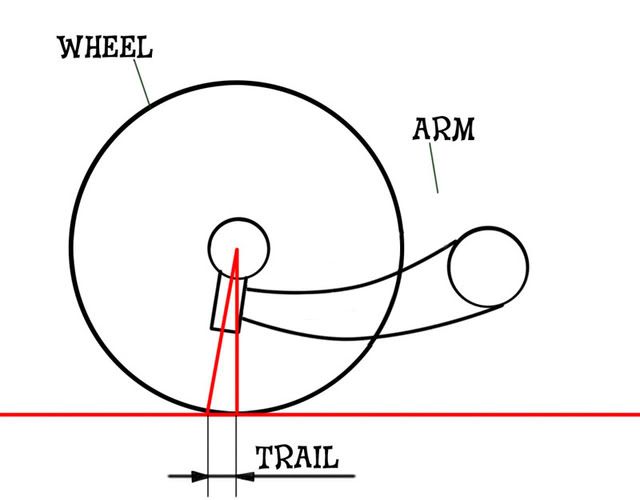
Right-o. A 2cv at standard height has the suspension arms in this sort of set up (thanks Olli for original sketch) :
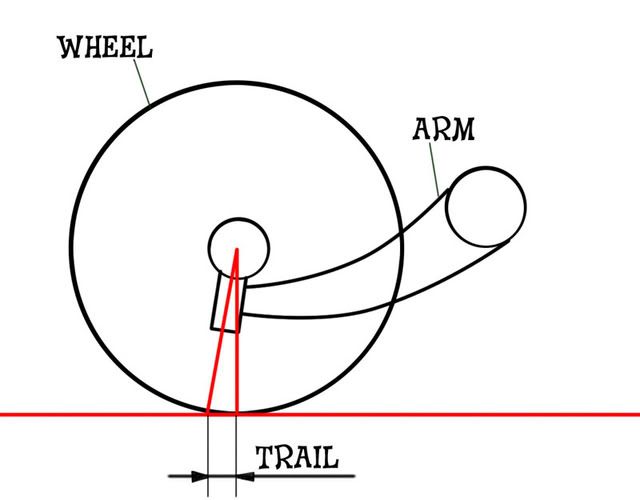
The axle Arm can rotate a certain amount on the axle tube it is attached to, in order for the car to move up and down when travelling over bumps. That's the basic "how it works" set up on a 2cv.
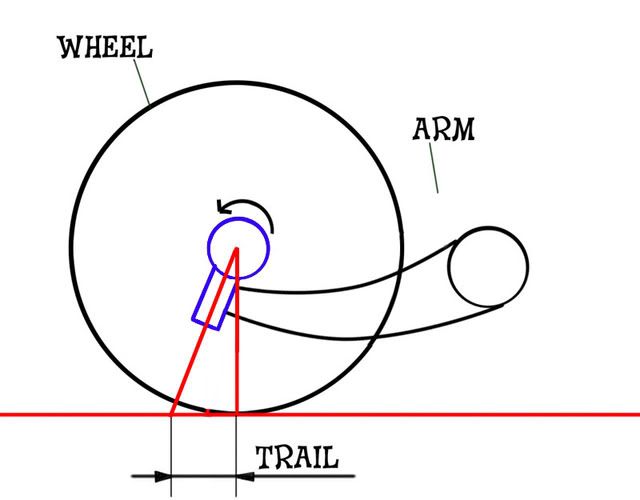
This is why it is so easy to lower a 2cv, without changing any parts... just unscrew the tie rod ends, thus lenghtening the tie rods, and making the arm rotate on it's axle, until the springs are in tension again :
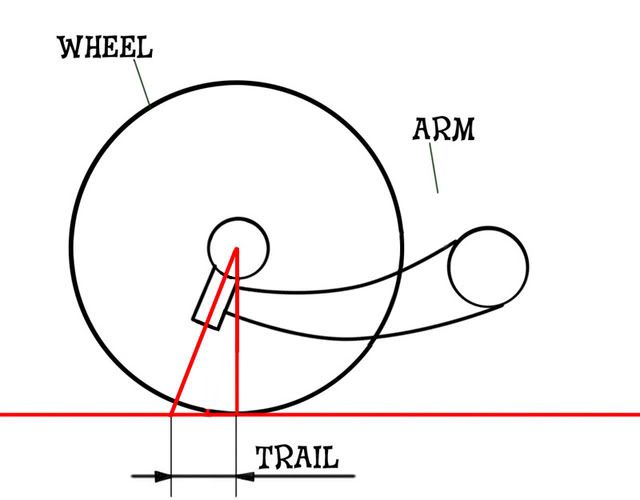
Here you can see the problem. the Steering hub swivel has followed the rotation that the arm has done, and therefore is lying back further, now subject to a huge amount of trail. this is what makes the steering hard on a stock lowered 2cv.
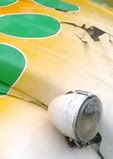
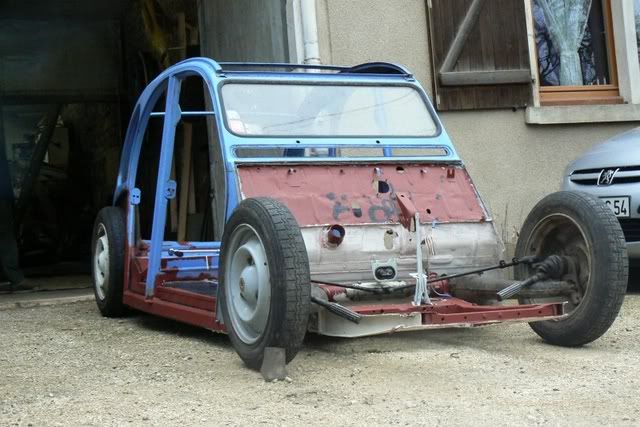
It is clearly visible on this Photo of Alex's 2cv :
What you need to do is the following. Here is a front arm (having it's kingpins changed). you can see that the swivel support is welded to the arm. it is in fact a shouldered piece of steel slotted into the arm, for extra strength.
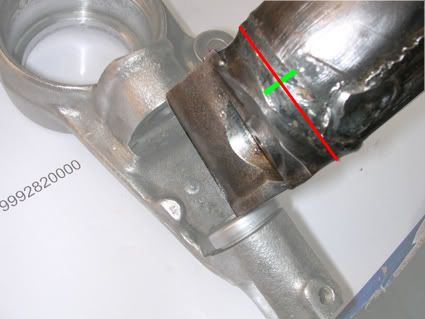
With a grinder, grind down the weld seam on a short distance and use the rule and scriber to mark the original position of the hub swivel in relation to the arm. (the green line on the photo.)
Then, very carefully, cut into the weld seam, not too deep (about 2-3mm, the thickness of the arm steel) in order to seperate the hub swivel part from the arm. You MUST cut the seam PARALLEL to the arm and hub swivel if you want things to line up nice and straight !!!
In the following picture, you can see what movement of the hub swivel (in blue) is necessary to obtain it's original angle.
So, securing the arm on your workbench, slot the swivel part back in, and rotate it towards the front of the car, (imagining the arm in place on the car).
the amount you move it depends on how low you want to go. It seems OK to shift the marks made with the scriber by 5-7 mm, for a very low 2cv. 7mm worked fine for my car, at this height :
Tack weld it in place, check the alignment, then do a full weld seam all round and fit the arms back onto the car.
And Hey presto ! Lowered arms with correct steering geometry !!
Because the track rod end lever (bolted to the hub swivel) is now further away, you will have to unscrew the steering rod adjusters to correct this, and check the front wheels alignment/parallelism.
And you could greatly benefit from hardening your suspension
Have fun, drive low. 
_________________
"That bumper fits there like sunglasses on pig"  O.E. O.E.

Last edited by JoZeF on Thu May 22, 2008 4:51 pm; edited 4 times in total |
|
| Back to top |
|
 |
dule
Lowered

Joined: 06 Jan 2008
Posts: 590
Location: Zagreb, Croatia
|
| Posted: Thu May 22, 2008 2:43 pm Post subject: |
|
|
| great! tnx it is a big help for me (I believe not just for me hehe) do you maybe have some BEFORE and AFTER photos of the process itself? |
|
| Back to top |
|
|
JoZeF
Grave Digger
Joined: 25 May 2007
Posts: 1734
|
| Posted: Thu May 22, 2008 3:07 pm Post subject: |
|
|
I'm sorry, I don't... unfortunately when I took the arms to my friend I forgot my camera... But i will be doing another pair sometime so I will be able to take pictures then...
_________________
"That bumper fits there like sunglasses on pig" O.E.
|
|
| Back to top |
|
|
dule
Lowered
Joined: 06 Jan 2008
Posts: 590
Location: Zagreb, Croatia
|
| Posted: Thu May 22, 2008 3:52 pm Post subject: |
|
|
| great, I'm pereparing my car for the summer and I have "spare" pair of arms so maybe i cold try to get them"lowered"...if I make mistake i still have a pair of arms extra hehe |
|
| Back to top |
|
|
Shedspeed
Dropped
Joined: 13 Jul 2007
Posts: 446
Location: kent, England
|
| Posted: Thu May 22, 2008 7:54 pm Post subject: |
|
|
when I did mine I used a 3mm spacer at the bottom of the join to give negative camber when the wheels are in the straight ahead position, I dont know if it makes any difference to handling, and I dont care, it looks cool!
_________________
 |
|
| Back to top |
|
|
JoZeF
Grave Digger
Joined: 25 May 2007
Posts: 1734
|
| Posted: Thu May 22, 2008 8:11 pm Post subject: |
|
|
Hehe
I believe negative camber is best on track cars... cause it's good for snooker table surfaces... the bumps and holes in normal roads make it a bit hairy to drive. but maybe you've put a good "slight" angle that won't hurt handling too much.

_________________
"That bumper fits there like sunglasses on pig" O.E.
|
|
| Back to top |
|
|
Shedspeed
Dropped
Joined: 13 Jul 2007
Posts: 446
Location: kent, England
|
| Posted: Fri May 23, 2008 7:24 pm Post subject: |
|
|
may be worth noting that on a 2cv, turned arms will put the front of the tyre very close to the wheelarch, and that by putting a bit of camber on them, you may move the top of the tyre in just enough to clear it? just a thought.
_________________
|
|
| Back to top |
|
|
JoZeF
Grave Digger
Joined: 25 May 2007
Posts: 1734
|
| Posted: Fri May 23, 2008 8:24 pm Post subject: |
|
|
Yeah Maybe, but "Who cares if the tyres blow when I'm driving down the road I'm a baddie in my 25 BHP slug Bla bla bla"

_________________
"That bumper fits there like sunglasses on pig" O.E.
|
|
| Back to top |
|
|
Etienne
Hoodrider

Joined: 25 May 2007
Posts: 2829
|
| Posted: Fri May 23, 2008 8:39 pm Post subject: |
|
|
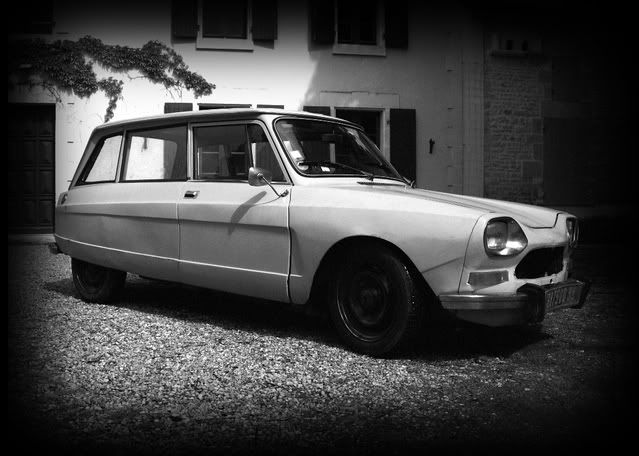
Maybe Geoff can tell about negative camber on a road use 2cv, just like he had on his Ami8.
_________________
www.super2cv.com |
|
| Back to top |
|
|
phoskam
Snailer
Joined: 30 Oct 2007
Posts: 19
Location: Rossum, Netherlands
|
| Posted: Thu Jul 24, 2008 6:01 pm Post subject: |
|
|
so if I understand it correct, the swivel support is mounted into the arm and then welded ?
If you carefully grind the weld away, then you can take it out after some time ? |
|
| Back to top |
|
|
JuanNavarro
Dropped

Joined: 16 Feb 2008
Posts: 171
Location: Madrid (Spain)
|
| Posted: Wed Jul 30, 2008 12:04 am Post subject: A pic |
|
|
Here is a pic of the front axle mounting
 |
|
| Back to top |
|
|
Olli
Soviet-Finn Photoshoper
Joined: 25 May 2007
Posts: 2146
Location: Soviet-Finland
|
| Posted: Wed Jul 30, 2008 11:46 pm Post subject: |
|
|
In that pic you can see how part of Hub goes into suspension arm.
-Olli
_________________
www.ollierkkila.com |
|
| Back to top |
|
|
phoskam
Snailer
Joined: 30 Oct 2007
Posts: 19
Location: Rossum, Netherlands
|
| Posted: Sun Aug 03, 2008 12:35 am Post subject: |
|
|
| thanks for the picture, now it's clear for me. |
|
| Back to top |
|
|
björn
Lowered
Joined: 19 Jun 2007
Posts: 1695
Location: hillywood(hilversum)/holland
|
| Posted: Sun Aug 03, 2008 8:44 am Post subject: |
|
|
soon whe are going to do 1 arm to test how
but i whas thinking is it also posible to make them narrow like on beetle?
_________________
 |
|
| Back to top |
|
|
JoZeF
Grave Digger
Joined: 25 May 2007
Posts: 1734
|
| Posted: Sun Aug 03, 2008 10:57 am Post subject: |
|
|
that's what Etienne had done for his dyane
_________________
"That bumper fits there like sunglasses on pig" O.E.
|
|
| Back to top |
|
|
|


