| View previous topic :: View next topic |
| Author |
Message |
Bart
Lowered

Joined: 17 Jun 2007
Posts: 783
Location: Södertälje
|
 Posted: Wed Feb 27, 2008 9:57 pm Post subject: Posted: Wed Feb 27, 2008 9:57 pm Post subject: |
 |
|
| marc2cv wrote: | | verry nice work, but i must say that i mostly like your shed. |
Thanks, the shed is great, as long as it doesn't rain...  No, I shouldn't complain at all I'm very happy with it, it's my parents and it offers a lot of space to play No, I shouldn't complain at all I'm very happy with it, it's my parents and it offers a lot of space to play  
Should post more pictures soon cause I made some progress.
Cheers, Bart
Last edited by Bart on Sun Mar 02, 2008 12:48 pm; edited 1 time in total |
|
| Back to top |
|
 |
Bart
Lowered
Joined: 17 Jun 2007
Posts: 783
Location: Södertälje
|
| Posted: Sun Mar 02, 2008 12:47 pm Post subject: |
|
|
Right, finally got some more pictures sorted:
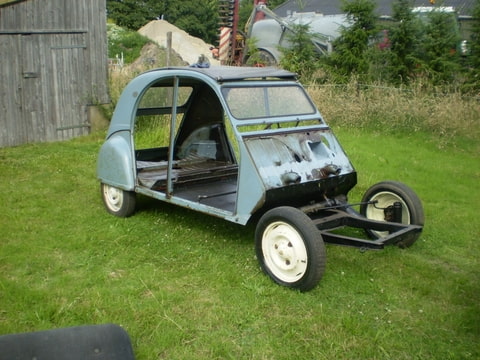
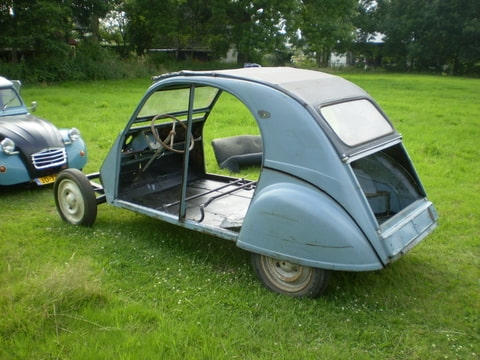
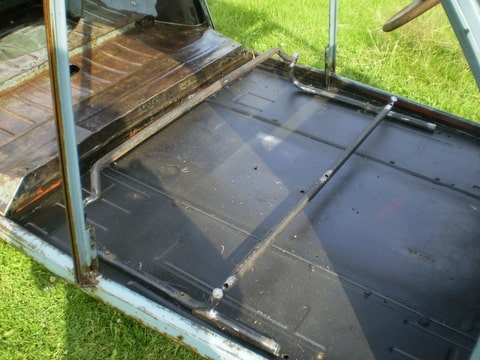
My rolling chassis:
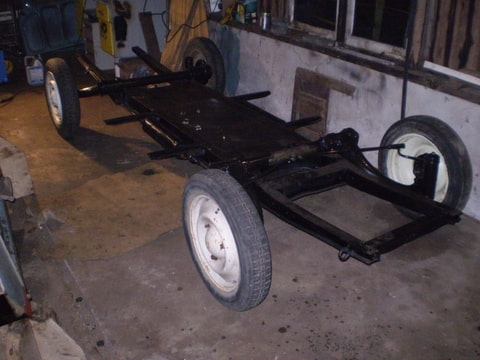 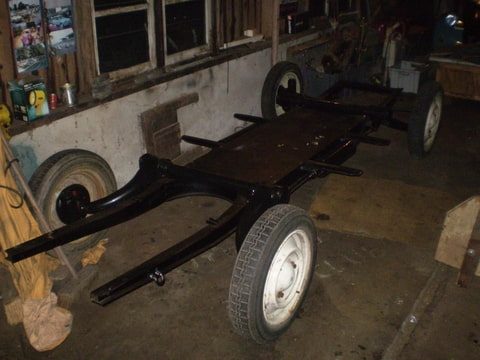
Sorry these pictures are not particurly good, but it is the best I have and I can't make better ones since I bolted the body on the chassis.
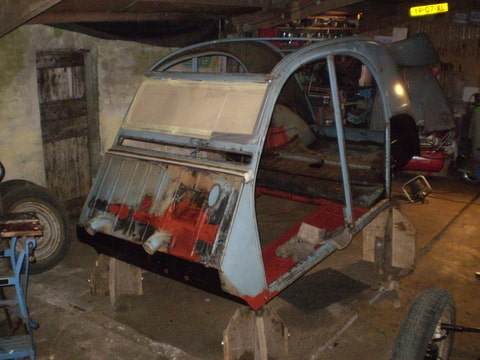
Body just before reunion with the chassis and I tacked it ones put on the chassis .
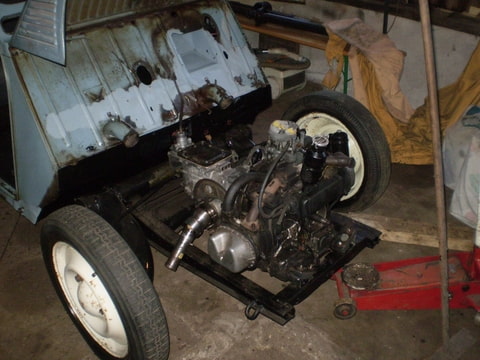
Furthermore I cleaned the ami6 gearbox
 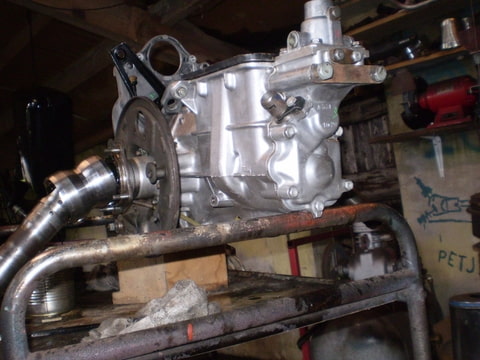
Surpising to notice the difference in aluminium quality between old and newer gearboxes, the surface of the older ones is much smouther which makes it easier to clean and leaves them just nice and shiny afterwards as where newer ones nearly always look dreadfull and still sort of oxidated even when they are properly cleaned 
Anyway I put the gearbox in the car and directly found out my first little problem. Although the box looks equal to a 425 one its bellhousing is much longer, leaving just not enough space for the also slightly longer ami6 engine, also because the distance from the front axle to the front crossbar is a few cm less on an early chassis. grrr. Nevertheless after some measuring I think I can just solve this by cutting a bit of the back of the rear gearbox mount, giving me about 1 cm which hopefully can just do the job...
Cheers, Bart |
|
| Back to top |
|
|
björn
Lowered
Joined: 19 Jun 2007
Posts: 1695
Location: hillywood(hilversum)/holland
|
| Posted: Sun Mar 02, 2008 1:49 pm Post subject: |
|
|
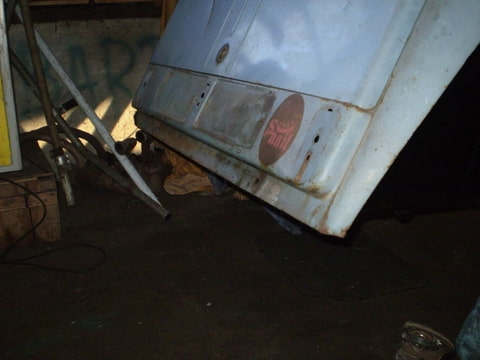
nice snail logo 
_________________
 |
|
| Back to top |
|
|
deuch'n'roll
Deltamics defender
Joined: 31 Jul 2007
Posts: 257
|
| Posted: Sun Mar 02, 2008 11:45 pm Post subject: |
|
|
Great project ;
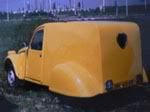
Old 2CV body looks very good !
_________________
-Thierry- |
|
| Back to top |
|
|
Bart
Lowered
Joined: 17 Jun 2007
Posts: 783
Location: Södertälje
|
| Posted: Wed Jul 23, 2008 8:26 pm Post subject: |
|
|
Hi all,
I didn't have much time, but did make some progress over the past months.
I fitted the body on the chassis and sprayed the body and the rims with three layers of clear paint. The spray work isn't perfect, but that doesn't hurt..
Only problem now is the roof it seems to short. It probably shrinked over the years...  have to find a solution for that. have to find a solution for that.
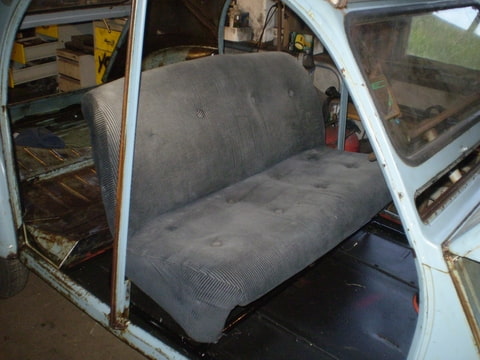
I also got this nicely faded ami6 rear seat given Because a rearseat doesn't directly fit and moreover it is too low and leaning backwards too much, I remade an old front seat frame of a Renault4  to suit the ami6 rear seat to my 2cv. to suit the ami6 rear seat to my 2cv.
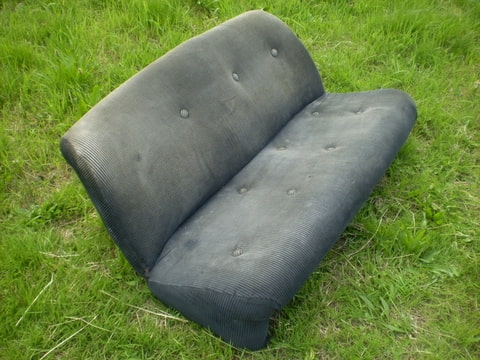 
Painted this frame and bolted it together. Must say I'm really pleased with it and it is very comfortable!!!
At the moment the doors and bootlid are waiting for warmer days to get sprayed as well. When that is done I want to build up the technique and ones i know where everything goes I'l do the front wings bonnet and smaller bits like the bumpers. Waiting for warmer weather I fitted the ami6 engine and box and modified the mounts last sunday.
Well that's it for now, let you know when I'm made some more progress!
Bart |
|
| Back to top |
|
|
SamClukkers
Lowered

Joined: 23 Jun 2007
Posts: 774
Location: Belgium
|
| Posted: Wed Jul 23, 2008 9:50 pm Post subject: |
|
|
Bart, I really like your car.  It's old, not rusty, blue (favorite color ) and you'll still be able to open the hood to look at a beautiful engine. The seat looks good too, a nice and comfy blue detail for the interior. It's old, not rusty, blue (favorite color ) and you'll still be able to open the hood to look at a beautiful engine. The seat looks good too, a nice and comfy blue detail for the interior. |
|
| Back to top |
|
|
backfire
Dropped
Joined: 14 Nov 2007
Posts: 346
Location: NL, 's-Hertogenbosch
|
| Posted: Thu Jul 24, 2008 12:13 am Post subject: |
|
|
For the roof, wait untill friday when it´s 30 degrees, put it in the sun, the heat will soften it maybe just enough to get it fitted again.
oh and for the car:
sweeeeeeeeeeeeeeeeeeeeeet.
_________________
2CV, with Visa turbo charged |
|
| Back to top |
|
|
Harley
Dropped

Joined: 26 Nov 2007
Posts: 394
Location: Braidwood - Australia
|
|
| Back to top |
|
|
Bart
Lowered
Joined: 17 Jun 2007
Posts: 783
Location: Södertälje
|
| Posted: Mon Jul 28, 2008 3:50 pm Post subject: |
|
|
Thanks for all nice reactions.
I fixed the roof, yesterday it was hot enough so placed it in the sun and after a few hours I could just stretch the roof just enough to fit it. Besides it was hot enough to spray the doors and the bootlid so I was well pleased . Sorry no pictures this time.
Ciao, Bart |
|
| Back to top |
|
|
CitroenAZU
Dropped

Joined: 17 Jun 2007
Posts: 327
|
| Posted: Mon Jul 28, 2008 9:06 pm Post subject: |
|
|
| Good work BArt!! |
|
| Back to top |
|
|
Bart
Lowered
Joined: 17 Jun 2007
Posts: 783
Location: Södertälje
|
| Posted: Fri Jan 02, 2009 5:02 pm Post subject: |
|
|
A new year, it is time for an update...
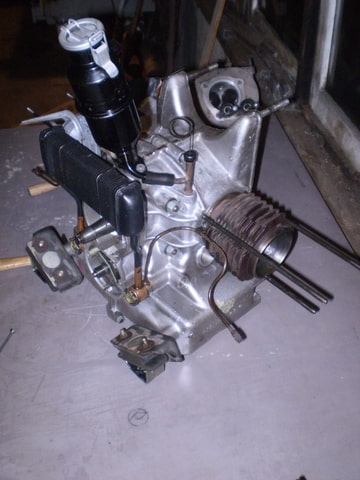
I have rebuild the engine over the autum and finished it last week.
I took the whole engine apart, cleaned it and had a good look at all the parts. Clearly the crank and cam are not like new after 100k kilometres, but as I can't and don't want to spend ridiculous money I just kept them as they are.
To gain some power I have replaced the original pistons by 8.5 compression pistons from 2cv6 and I got 0.4mm machined of the back of the barrels to raise compression even further... Furthermore I honned the barrels and fitted new piston rings.
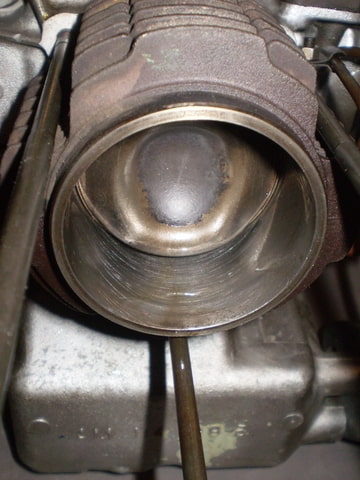
And obviously fitted it all with new gaskets and seal, where especially this rear seal was rather expensive because it is an odd size which I needed o order specially.
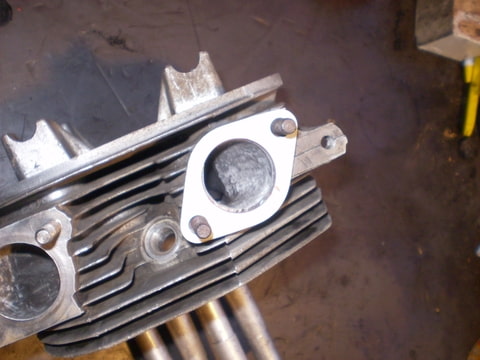
Finally for the engine I did some work on the heads. obviously cleaned them completly including all black cool rubbish .
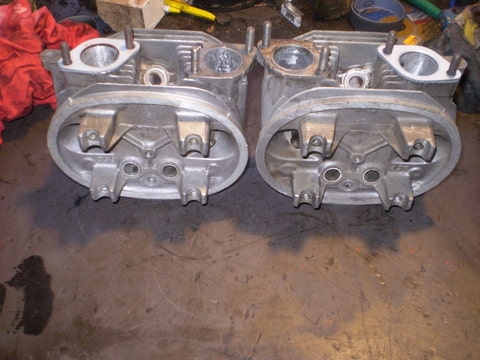 
And did a little bit of machining on the heads. Smoothened some sharp edges and opened op the exhaust ports as the were tighter than the manifold diameter...
I have also remade an 2into1 exhaust but haven't made pictures of that jet, but will post them later.
_________________
I like to play |
|
| Back to top |
|
|
Bart
Lowered
Joined: 17 Jun 2007
Posts: 783
Location: Södertälje
|
| Posted: Fri Jan 02, 2009 9:02 pm Post subject: |
|
|
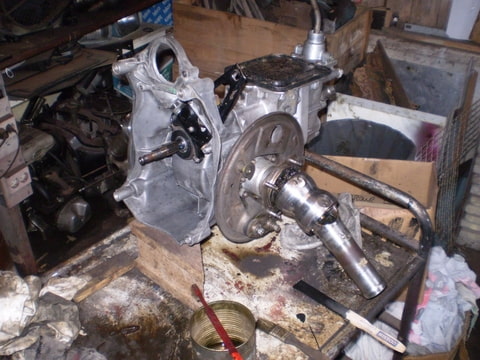
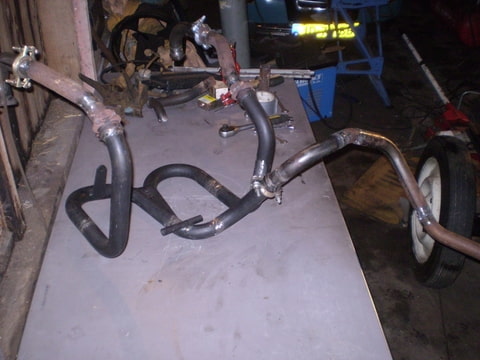
Okay I made some pictures of the exhaust I've done.
I used a 2in1 exhaust which Louis Barbour and I designed for normal 2cv6 and replaces the crossbox.
Because I'm using an M4 engine and related gearbox the 2in1 doesn't fit straight away. Brakes and the manifold are different.
So I modifed the 2in1 to suit the big drums and keep space for the master cylinder. Furthermore I made special pipes to go on the heads and finally modified some 2cv6 heatexchanger pipes to suit.
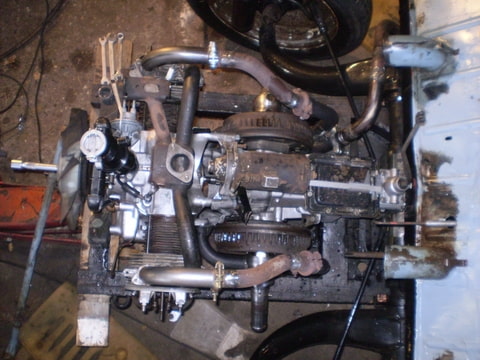
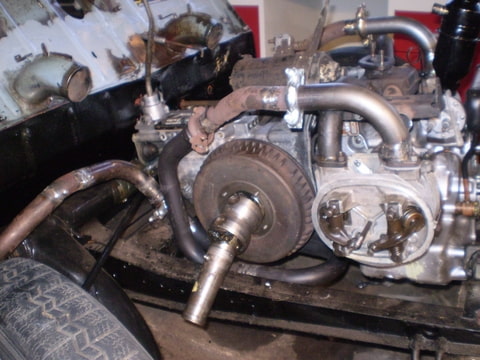 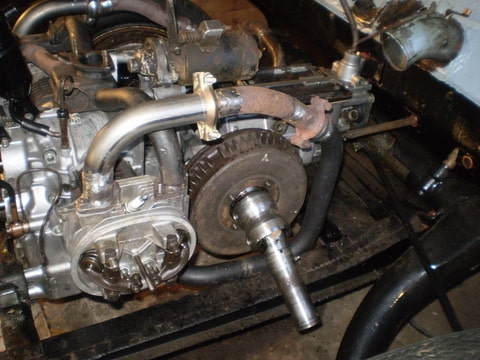
Finally I changed the side where the 2in1 exits and made a swanneck to suit.
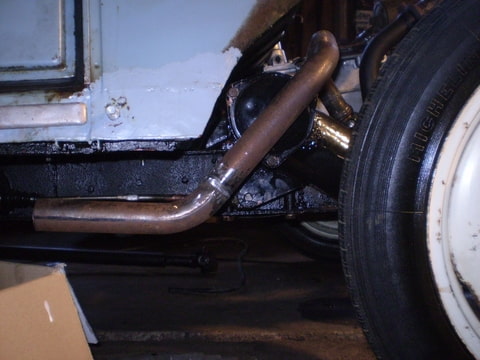
And two pictures of the exhaust out of the car.
_________________
I like to play |
|
| Back to top |
|
|
Olli
Soviet-Finn Photoshoper
Joined: 25 May 2007
Posts: 2146
Location: Soviet-Finland
|
| Posted: Fri Jan 02, 2009 9:20 pm Post subject: |
|
|
Nice job! Thats fine looking exhaust!
-Olli
_________________
www.ollierkkila.com |
|
| Back to top |
|
|
Green-Duckman
Snailer
Joined: 19 Sep 2007
Posts: 90
Location: Zeeland in the Netherlands
|
| Posted: Sat Jan 03, 2009 12:44 pm Post subject: |
|
|
Realy nice looking exhaust indeed!
_________________
'79 2CV vert bambou |
|
| Back to top |
|
|
Etienne
Hoodrider
Joined: 25 May 2007
Posts: 2829
|
| Posted: Sun Jan 04, 2009 10:00 pm Post subject: |
|
|
Great to see some updates ! Good job mate !
_________________
www.super2cv.com |
|
| Back to top |
|
|
|


